Friday, May 31, 2019

Ping Ping Anybody Home ???

For a complete index of all my stories click this line

A nice feature of the Philips Hue lamps is called Geofencing. This just means that you can instruct the Hue bridge to automatically switch your lights on when you are approiaching your house. So for a time I wondered how they do that. And in fact it is very easy.

It is a technique that can be used for many different purposes. Not only to test if you are around but this also makes it possible to test wether your wireless apparatus are actually functioning.

It's called ping.

Ping

Ping is a network function that sends a command to an IP adress. If the device with that IP adress is connected to the router you will get a response. If the device is off (not connected) then you will get an error back.

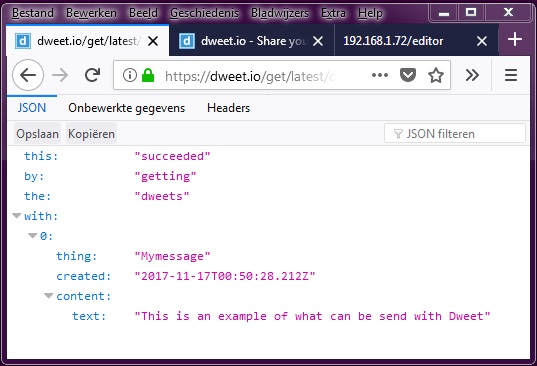
It is even possible to ping web-adresses. That way you can see if a certain server on the web is on-line.
If you for example want to test wether this web-log is still on-line you could use something like the next command:
ping("http://lucstechblog.blogspot.nl/")

Ping Ping Anybody Home ?

So how is that going to tell me wether anybody is home or nearby. Well simple. Most people I know always carry their mobile phone around. So do I. And most of the time wifi is turned on. So if I give my phone, and for that my girlfriends phone etc, a fixed IP adress in my router I can Ping that IP adress et voila.

Give your home mates a fixed IP adress.

Start with opening the IP adress of your router in your browser. In my case my router has IP-adress 192.168.1.1 Your's may vary so look it up in the manual.


Enter the ip-adress in your browser and if you have a Zyxell router like I do you will be presented the above screen. Different routers give different results, but it should be easy to find the page that shows all connected devices.

As you can see I have given all my networked devices meaningfull names. So let's look at the details of my phone.


First you can see my phones IP-adress and as you can see I checked Static DHCP. This makes sure that everytime my phone connects to the router it will get the same IP adress.
Do this for all the phones and wireless apparatus in your home.

Ping ??

Ping is a wifi function. In some languages it is build in (yes in Basic) and in some languages it is not. What I wanted is to have my ESP Ping my devices and depending on the outcome switchs led's (relay's) on or off.

Standard C++ (Arduino) for the ESP has all kinds of Wifi functions build in but no Ping.

Fortunately Daniele Calanardi has build a library that we can use. You can download that library from the following link: https://github.com/dancol90/ESP8266Ping

Unpack the library and place it in your \Arduino\libraries folder and start the Arduino IDE.

Circuit


The hardware is simple just an ESP8266 (I used a NodeMCU) and 4 leds connected through 220 Ohm delimiting resistors. The led's are attached to D0, D1, D2 and D4.

The Arduino source


/*
 * Anybody Home ??? 
 * This program tests IP numbers with PING to see if they are
 * active. If so the Led will be on if the IP number is not
 * active the Led will be off
 * This way we can check activity and person presence
 * Written by Luc Volders
 */

#include 

<ESP8266WiFi.h>
#include 

<ESP8266Ping.h>

const char* ssid = "XXXXXXXXX";
const char* password = "YYYYYYYYY";

const IPAddress thermometer(192, 168, 1, 65);
const IPAddress domoticz(192, 168, 1, 66);
const IPAddress Lucsphone(192, 168, 1, 70);
const IPAddress elsphone(192, 168, 1, 72);

void setup() 
{
  pinMode(D0,OUTPUT);
  digitalWrite(D0,LOW);
  pinMode(D1,OUTPUT);
  digitalWrite(D1,LOW);
  pinMode(D2,OUTPUT);
  digitalWrite(D2,LOW);
  pinMode(D4,OUTPUT);
  digitalWrite(D4,LOW);
  delay(10);

  // Start by connecting to our WiFi network

  WiFi.begin(ssid, password);
  
  while (WiFi.status() != WL_CONNECTED)

 
  {
    delay(100);
  }
}

void loop() 
{  
  if(Ping.ping(thermometer)) 
    {
      digitalWrite(D0,HIGH);
    } 
  else 
    {
      digitalWrite(D0,LOW);
    } 
  if(Ping.ping(domoticz)) 
    {
      digitalWrite(D1,HIGH);
    } 
  else 
    {
      digitalWrite(D1,LOW);
    }  
    if(Ping.ping(Lucsphone)) 
    {
      digitalWrite(D2,HIGH);
    } 
  else 
    {
      digitalWrite(D2,LOW);
    }  
    if(Ping.ping(elsphone)) 
    {
      digitalWrite(D2,HIGH);
    } 
  else 
    {
      digitalWrite(D4,LOW);
    }  
  delay(1000);
}


Let's look closer to the program.

#include <ESP8266WiFi.h>
#include <ESP8266Ping.h>

to activate the wifi functions of the ESP we need to include the Wifi library and for Ping we need to include the ESP8266Ping.h library.

const char* ssid     = "XXXXXXXXX";
const char* password = "YYYYYYYYY";

Fill in your router's credentials so you will connect to your network automatically.

const IPAddress thermometer(192, 168, 1, 65);
const IPAddress domoticz(192, 168, 1, 66);
const IPAddress android(192, 168, 1, 70);
const IPAddress elsphone(192, 168, 1, 75);

Look in your router for the IP adresses of your Wifi Devices and replace the ones I have used.

The rest of the program is straighforward.

  if(Ping.ping(Lucsphone))    
    {                         
      digitalWrite(D2,HIGH) ; 
    }                         
  else                        
    {                         
      digitalWrite(D2,LOW);   
    }                         


In the loop all devices are pinged. In this part the IP number of my phone is pinged. If it is present Ping will respond with a 1. If I am not at home Ping will respond with a 0 and the led will be set on or off accordingly.

This can be optimized :

digitalWrite(D2,Ping.ping(Lucsphone));

However I wanted the code to be easy to follow for less experienced C++ programmers.

Basic program

Naturally (I know some loathe this) I wrote the same program in ESP-Basic which is my favorite rapid software devellopment platform. So I hereby give you the simple code that does the same as the C++ program:


io(po,D0,0)
io(po,D1,0)
io(po,D2,0)
io(po,D4,0)

timer 1000, 

[testping]

wait

[testping]

io(po,D0,ping("192.168.1.65")) 'thermometer

io(po,D1,ping("192.168.1.66")) 'domoticz

io(po,D2,ping("192.168.1.70")) 'luc's phone

io(po,D4,ping("192.168.1.72")) 'els phone

wait


Let us look at some details.

io(po,D0,0)
io(po,D1,0)
io(po,D2,0)
io(po,D4,0)

These lines set all the leds in the initial state which is off.

timer 1000, [testping]

This line initiates a timer that every second (1000 miliseconds) jumps to the routine testping.

io(po,D2,ping("192.168.1.70")) 'luc's phone

This line actually tests whether my phone is detected by the router so if I am in. Depending on the
feedback it sets the led on or off. Replace the IP numbers with your own.

That's all folks.

Just for usability I modified the program so it has a webpage on which the information is displayed as wellas leds giving the information. So if you are around the ESP the leds will show what's happening and if you are not in its neighbourhood you can check the webpage.


io(po,D0,0)
io(po,D1,0)
io(po,D2,0)
io(po,D4,0)

timer 1000, [testping]

wprint |<body style="background-color:powderblue;">|
wprint |<H1><span style="color: red;">|
wprint "Anybody Home ??"
wprint "</H1>"
wprint "<h3>Thermometer  "

textbox therm
cssid htmlid(), "background-color:powderblue;border-style: hidden;font-size: 16px;display:block;width:80px"

wprint "<br>"
wprint "Domoticz         "
textbox domo
cssid htmlid(), "background-color:powderblue;border-style: hidden;font-size: 16px;display:block;width:80px"

wprint "<br>"
wprint "Luc's phone      "
textbox lucphone
cssid htmlid(), "background-color:powderblue;border-style: hidden;font-size: 16px;display:block;width:80px"

wprint "<br>"
wprint "Els phone        "
textbox elsphone
cssid htmlid(), "background-color:powderblue;border-style: hidden;font-size: 16px;display:block;width:80px"

wprint "<br>"
button "QUIT", [progend]
wait

[testping]
therm = ping("192.168.1.65")
if therm = 1 then
io(po,D0,1)
therm = "available"
else
io(po,D0,0)
therm = "off line"
endif


domo = ping("192.168.1.66")
if domo = 1 then
io(po,D1,1)
domo = "available"
else
io(po,D1,0)
domo = "Domoticz off line"
endif

lucphone = ping("192.168.1.70")
if lucphone = 1 then
io(po,D2,1)
lucphone = "at home"
else
io(po,D2,0)
lucphone = "he's not in"
endif

elsphone = ping("192.168.1.72")
if elsphone = 1 then
io(po,D4,1)
elsphone = "available"
else
io(po,D4,0)
elsphone = "she's out"
endif

wait

[progend]
io(po,D0,0)
io(po,D1,0)
io(po,D2,0)
io(po,D4,0)
end

The result.


Modifications.

Use your imagination.

You can send the information to cloud-based IOT servers like thingspeak (look for a tutorial here:
https://lucstechblog.blogspot.nl/2017/11/thingspeak.html )

Replace the leds with relays so the lamps will go on if you approach your house.

Send the information to your home-automation system (like Domoticz which I am using) so
it can alter your thermostat settings or switch on your lights etc.

Till next time.
 

The next few weeks I am off on a long-earned holliday. There is however enough material on this web-log to get you going and start experimenting. So till July and remember:

Have fun !!

Luc Volders

Friday, May 17, 2019

At last.....but only dutch for now

For an index to all my stories click this line

Just a short entry today because today was the day I was eagerly waiting for.


By mail I received the proof of my book. So I spend the day checking if everything
was well. And boy I loved it. The print was crisp and clear. 
368 Pages information on the ESP32. From installing the software on your PC to building your own webserver to control lamps, motors etc and remotely read your sensors.
All written in the Arduino language (C++) with breadboard schematics made in Fritzing.

For now only in Dutch. I am working on the English version.

It will be available in bookshops and websites, on demand, throughout the Netherlands in the next weeks, when I finish checking and give the green light for publishing.

So if you want to buy one, send me an email : lvolders@gmail.com
As soon as it is available I will give you notice. Just state wether you want to buy the Dutch or English version. The english version will be available through a yet to be chosen publisher.

Nederlands

Vandaag is de dag waar ik al een tijdje naar uitkeek !!!
Ik ontving per post de drukproef van mijn boek: ESP32 uitgelegd.
Ik ben nu aan het controleren of ik er nog ernstige fouten in tegenkom en daarna kan het gepubliceerd worden. Dat zal nog een paar dagen tot maximaal 2 weken duren.

Het boek heeft 368 pagina's met informatie over de ESP32 van het installeren tot het maken van een webserver waarmee je motoren, lampen etc kunt bedienen of je sensoren uitlezen. Alles in C++ de bekende Arduino taal. Het is een werkboek voor beginners met veel uitleg, een of meer oefeningen aan het einde van elk hoofdstuk en ideeen voor projecten die je met de informatie uit het boek kunt bouwen.

Als je het wil kopen, stuur dan een mail naar: lvolders@gmail.com
Zo vlug als het echt beschikbaar is krijg je dan een berichtje van mij. 
In Nederland zal het boek te koop zijn bij boekhandels, webshops als bol.com en via de webshop van de drukker. Als elektronica winkels of fablabs geïnteresseerd zijn kunnen ze ook contact met mij opnemen.

Luc Volders

Friday, May 10, 2019

MP3 Player - stand alone

For an index to all my stories click this line

I know they are getting a bit outdated but there are still some uses for them: MP3 players. And sometime ago when I was surfing the net (who uses that expression nowadays.....) I stumbled upon a great MP3 module.


The module is sold and documented on the internet by several names. The first name is MP3-TF-16P and the second name is the DFPlayer Mini. Both seem to be exactly the same module.

So what is it.

It is an MP3 chip with an SD card reader on one module. The module is breadboard friendly and can be powered by any voltage between 3.2 to 5 Volts. So suitable for Arduino and ESP8266 projects. Next to that it has an onboard 3 Watt amplifier so you can direct attach a speaker. There is also a headphone / amplifier output with which you can attach a headphoe or attach it to your home stereo set.

The module supports MP3 and WMV decoding and sampling rates up to 48khz. The SD card supports FAT16, FAT32 up to 32GB with a maximum of 100 folders with each 1000 songs. The speaker and headphone connectors are attached to a 24 bit DAC with a dynamic range up to 90dB

Besides all this the module can be controlled by digital I/O ports, a resistor cascade on analog ports and by a serial interface.

Last but not least there seems to be an USB interface build in. I have found however no information or documentation on that up to now.

All in all pretty amazing specifications for a module that (at this moment) can be bought for about 1 dollar / euro from our favorite chinese suppliers !!!


Controlling the MP3-TF-16P

Like I mentioned above there are 3 methods to control this module.

- Using switches on the digital I/O pins
- Using switches with a resistor cascade on 2 analog inputs.
- Sending commands over the serial interface

As there are digital I/O pins the module can be controlled by an Arduino or an ESP8266. This can also be done by sending commands over the serial interface. There is an Arduino library available for that.

The resistor cascade needs some explanation.

Basically a range of resistors is connected to Ground. The remaining pin is connected to a switch which is connected to one of the analog inputs. Pressing a switch will therefore send an electric signal which value is dependend on the resistor value. This will trigger a specific command.


I think the schematic explains all.

You can find more information in the manual for this module which can be found here:

https://www.dfrobot.com/wiki/index.php/DFPlayer_Mini_SKU:DFR0299

A minimalist MP3 Player

I started with building a minimalists MP3 Player.

The only things you will be needing to build this are:

- battery holder for 3 AA batteries
- a breadboard
- some breadboard cables
- 2 switches

For the battery holder I used my own version which you can find here:
http://lucstechblog.blogspot.com/2016/04/3d-printed-battery-holder-i-was.html

In the final version I attached a switch to the VCC power line. That made it possible to switch between battery power and an USB power bank.


The switches are attached to GND and the I/O pins.
The DAC-L and DAC-R outputs arae attached to a headphone or to an amplified speaker or to an input on your home stereo set.


The above picture shows you my real-world test setup. I have used this with simple head-phones, an USB powered speaker and attached it to my stereo set.

I was impressed by the overall sound quality. It was much better as I expected from such a cheap module.

Flaws.

well yes there are a few problems / flaws.

Watch the cabling.
By using leads that are too long there is noise being picked up. This will disappear at higher volumes but is annoying at low volumes. Strange is that it did not occur all the times. Whyen skipping through the songs on the SD card the noise seemed to disappear. However best practice is to keep the lines short to avoid the noice alltogether.

No continuity
The MP3 player stops playing after each song. You will have to press the next or previous button for playing another song.

Solutions

For the noise the solution is simple: keep the leads as short as possible.

For the continuity the solution is obvious: use an Arduino or ESP to control the module. That's something that is coming up in another story.

Till then,
have fun

Luc

Friday, May 3, 2019

Dweet: A volatile IOT cloud service

For an index to all my stories click this line

In a previous story which you can read here I wrote about Thingspeak. Thingspeak is a service where you send (sensor) data which is then displayed on a webpage. The advantage of this is that you can check your data from anywhere in the world. This way you do not have to open a port on your router to get to your data which may present some vulnerability.

Dweet is a similar service only with a twist.


The name Dweet is derived from Twitter where you tweet messages. Dweet is Data tWEETing. You can send as many data sets to dweet as you like but only the last five are stored for 24 hour. Next to that Dweet does not offer a website where you can check your data. Data has to be retrieved by an API call and is send back in JSON format. You even do not have to make an account on the Dweet service. You just Dweet your data and that's that.

Sounds complicated ??? Well it is not. Read on.

So why should you use Dweet.

First you do not have to make an account or anything. You can use the service without logging in or any other means of identifying yourself. So Dweeting is pretty anonymous. Next you can send as many Dweets as you like. A Dweet can contain up to 2000 characters. So thats an awfull lot of sensor data you can send. Besides that you can have multiple microcontrollers each sending Dweets under a different name. All those Dweets can be retrieved by one or more different microcontrollers even by multiple users.

I presume this all sounds hazy. So let's start with some examples that make everything clear for you.

Let's start !

Suppose you have a sensor reading that you want to share. For simplicity's sake let's say it is a temperature value of 25.

Dweet is meant to be used for the IOT (Internet Of Things). So to distinguish your Dweet amongst the thousands of other Dweets send every minute, think up for an unique name for your Thing. Keep it simple so you can remember it easily. For example. My name is Luc I, I want to Dweet the temperature and it is 2018. Lets call my Thing: Lucstemp2018

Now we have a name (Lucstemp2018) and an example sensorvalue (25). Let's Dweet that.

The Dweet.io home pages tells us to dweet you simply have to call an URL like:

https://dweet.io/dweet/for/my-thing-name?hello=world

In our example that would be:

https://dweet.io/dweet/for/Lucstemp2018?temp=25

Just put that in your Browser and you will get the following message back:


As you can see the Dweet has succeeded, the name of our Thing is Lucstemp2018 and the data what we are looking for is called temp and the value is 25.

Let's see if we can retrieve the information. For retrieving we use again an API call. The home page tells us again the general format which is:

https://dweet.io/get/latest/dweet/for/my-thing-name

That's easy to implement for our example. The Api Call should be:

https://dweet.io/get/latest/dweet/for/Lucstemp2018

Again put this in your browser and you will get the following result:


So we succeeded retrieving the data. The Thing name is the same and the data is 25.

ERROR !!!!


If something in the name is wrong or you are trying to retrieve data that was send more as 24 hours ago you will get an error message looking like the above picture.

Sending and retrieving multiple data.

Suppose you want to send multiple data. For example not only the temperature but also a notification if a door is open, a window is open and if a light switch is on or off.

Well that is easy. You just add multiple data by combining them with the & sign.

Lets try with the temperature and the indication of a light switch. We send a 1 if the switch is on and a 0 if the switch is off.
You could send the words ON and OFF however I will combine Dweet in the future with another service called Freeboard and for that purpose it is easy to represent on with 1 and off with 0.

Here is the Dweet, put it again in your browser:

https://dweet.io/dweet/for/Lucstemp2018?temp=18&switch=1


And here is the confirmation that we succeeded. As you can see two variables have been saved being temp and switch.

Lets see if we can retrieve that. The command for retrieving is the same one we used before:

https://dweet.io/get/latest/dweet/for/Lucstemp2018


There it is: we have retrieved the data.

Remember that I told you that a Dweet can contain up to 2000 characters. Therefore you can not only send sensor data but also complete texts. An example could be:

https://dweet.io/dweet/for/Mymessage?text=This is an example of what can be send with Dweet


And bingo, this worked. Without any hassle we created a new Thing which is called Mymessage and the variable is called text. This does not erease or interfere with the previous thing which still exists (as long as there have not waited 24 hours)

To retrieve the text you use the next call:

https://dweet.io/get/latest/dweet/for/Mymessage


And this is the result.


In case you are wondering...........
YES this story was written on 17 November 2017 at almost 1 o'clock in the night.

The purpose of all this.

So what's the purpose of this. What can we do with it.

Suppose you are at work and want your loved ones at home to know that you are on your way home. This can be done by having an ESP8266 at your work sending a Dweet and at home an ESP can be polling the latest Dweets so they know when you are coming home. As you might have seen in the previous examples Dweet automatically adds the date and time to a Dweet. So your loved ones even know when you have left work.

Let's look at another example.
Attach at holliday cottage a door or drawer sensor to an ESP and let it Dweet when the door or drawer is opened. An ESP at home can then check for Dweets and see if the door/drawer were opened and blink a light or give an audible signal or even send a message to your Phone.

"Hoho" is what I can here you think. The examples show how to Dweet from your browser. But your talking about Dweeting with an ESP.  So let's do that.

Dweeting from a program.

We can do this the hard way (the C++ way) or the easy way. Well I am lazy so let's take the easy way. Let's use my favorite devellopment tool: ESPBasic.

I am using ESPBasic here as it is (in my humble opinion) THE most easy developping environment for the ESP series. You can read a detailed instruction on how to install ESPBasic and take the first steps here: http://lucstechblog.blogspot.nl/2017/03/back-to-basic-basic-language-on-esp8266.html


' =================================================
' Dweet for Luc's weblog
' First send a fake temperature and switch
' =================================================

tosend$ = "dweet.io/dweet/for/Lucstemp2018?temp=18&switch=1"
print wget(tosend$,80)
delay 2000

' =========================================
' now lets see if we can retrieve the Dweet
' =========================================

request$ = wget("dweet.io/get/latest/dweet/for/Lucstemp2018",80)
print request$

You can see there isn't much to it.

The sending part.

tosend$ = "dweet.io/dweet/for/Lucstemp2018?temp=18&switch=1"

First we make a string containing the api call.

print wget(tosend$,80)

Next print wget sends it onto the internet.

The retrieving part.

request$ = wget("dweet.io/get/latest/dweet/for/Lucstemp2018",80)
print request$

Just as simple as the sending part.

Suppose you want to distill the temperature out of the answer that is returned.

reqfound$ = JSON(request$, "temp")
print reqfound$

Takes care of it all.
The JSON parser distills the value of the temp variable for you.

Here is the complete code that first sends a Dweet, then waits 2 seconds and then retrieves it after which the required data is distilled:


' =================================================
' Dweet for Luc's weblog
' First send a fake temperature and switch
' =================================================
wprint "<br>"
wprint "Sending the Dweet<br>" wprint "=================<br>" tosend$ = "dweet.io/dweet/for/Lucstemp2018?temp=18&switch=1" wprint wget(tosend$,80)
wprint "<br><br>"
delay 2000 ' ========================================= ' now lets see if we can retrieve the Dweet ' ========================================= wprint "Receiving the Dweet<br>" wprint "===================<br>" request$ = wget("dweet.io/get/latest/dweet/for/Lucstemp2018",80) wprint request$
wprint "<br><br>"
' ========================================= ' now lets see if we can retrieve the Dweet ' ========================================= wprint "The temperature is<br>" wprint "==================<br>" reqfound$ = JSON(request$, "temp")

This is how it looks in the output window:


There's more

Just go to Dweet's home page and you will find a few more API calls which you can use. There is also a paid service that makes it possible to save the Dweets for a month. You can find the homepage here: https://dweet.io/

Ok guys and girls.
Time for you to do some experiments.
Play with this and wait for the next installment.

Have fun

Luc Volders