Friday, April 21, 2023

Connecting a 12volt doorbell to an ESP and Domoticz

For an index to all my stories click here

We have an old doorbell. Not the new wireless stuff but an old one working with a 12 volt AC transformer and a hammer that hits a bell. It is lying on the floor, collecting dust, under a closet in a corridor on the first floor in our house (we have a drive-in house with the living room on the first floor).


The bell makes enough sound to warn you when someone is at the door. However sometimes we can not hear it, For example when we are in the garden during summertime. I had the idea to connect it to my Domoticz Home automation system.

Well I could get myself a new fancy wireless doorbell from CoCo (Click on Click off, Klikaanklikuit in Dutch). This poses two problems. The Coco bell works on a power outlet, however the button works on a battery. And I dont like batteries for long term projects. I forget to replace them and they are always empty when you have no spares.

So I started to search the internet on how to attach a 12volt AC signal to a 5 volt DC circuit. And here the quest began.

The common way to transform 12 volt AC to 5 volt DC is to use a rectifying bridge and a power regulator. That is if you have need for a constant power source. But that is not what I needed. I just wanted to detect the signal when the bell button was pressed.


Above is the schematic that shows how the doorbell works. The transformer (on the left side) brings the power outlet down to a 12volt AC current. The button interrupts the power and when the button is pressed the bell wil get its power. The bell itself is mechanical. When it gets power the hammer beats against te bell and that breaks the electrical contact. So the hammer falls down to its original position and gets power again to beat again against te bell. The cycle keeps on going till you release the button.

Only when the button is pressed the bell gets its power. So I have to check the contacts across the bell to know if someone pushes the button.

I did not want the 12Volt be in direct contact with my other electronics. An optocoupler comes to mind. Yet they are made for DC current and not for AC current. Besides that I do not have any opto couplers.

Searching the net and having a conversation with a friend of mine who is excellent with electronics we came up with the following solution:


I took 2 leds and connected them counterwise. Connecting cathode to anode and the other way round. And I attached a current delimiting resistor of 3.3K Normally such a resistor has a far lower value. We are however working with higher voltages. If you decide to build this yourself, make sure you use the 1/4 watt or 1/2 watt resistors. The small 1/8 watt resistors can not handle the higher current it has to reduce.


I put the leds on a breadboard next to eachother and placed an LDR right acros them so the lights would shine full on the LDR. The LDR was at first connected to the analog input of the ESP8266 using a pull-down resistor.

The schematics were made in EasyEDA which really works well for designing schematics and even making PCB. EasyEDA has a large (no huge) library of components and it is quite easy to learn. And it is free to use. They earn their money when you order PCB's from them. There is no breadboard layout so for that I'll stick to Fritzing. You can find EasyEDA here:  https://easyeda.com/

As we are working with AC it means that 25 times a second (we use 50Hz in the Netherlands) alternating one of the leds would be put ON. This alters the LDR's resistance.

Now I had a kind of an AC opto-coupler.

First test was to attach a batterypack to the setup. I used 6 1.5V batteries in series. This gave about 9 volts. And it worked. One of the leds was ON the other OFF. When I switched the battery poles the other way round the other led went ON and the first led went OFF.


int sensorPin = A0;
int sensorValue = 0;

const int buttonPin = 13;

void setup() {
  // put your setup code here, to run once:
  Serial.begin(9600);
  pinMode(buttonPin, INPUT);

}

void loop() {
  // put your main code here, to run repeatedly:
  sensorValue = analogRead(sensorPin);
  Serial.println(sensorValue);
  Serial.println(digitalRead(buttonPin));
  delay (100);
}

I wrote a simple program that would read the analog port off the ESP8266 and display its values on the Serial Monitor. I covered the leds and the LDR with a cloth and applied the 9volts from the batteries again. When the leds were OFF the values on the Ananlog port were high and when the leds  were ON the values dropped. It worked !!!

Then I had an idea. What would happen if I attached the LDR to a digital I/O pin ??? This is an abuse of electronics. But I tried it anyway. And that worked too. Better as expected. When the leds were OFF the digital I/O pin was LOW, and when the leds went ON the pin went HIGH.

Why would I do that ?
I could simply test for the analog values which would be good practice.
However if I could switch a digital pin this way I could trigger an interrupt and did not have to poll the IO pin all the time.
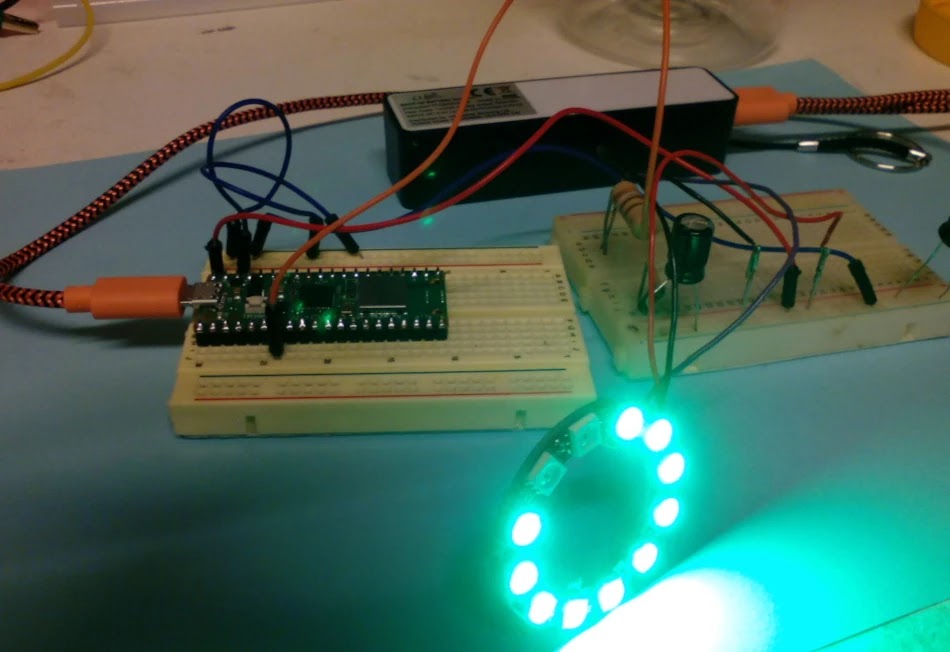
Breadboard setup

To make things clear I give you the breadboard setup.


I bend the leads of the leds and the LDR in such a way that the leds would shine direct on the LDR. I connected the VCC and GND to the 3.3V pins on the ESP8266 and the LDR signal line was attached to pin D0 (16).

At the led side the risistors were atached parallel to the bell. So there would flow currect only when the button was pushed.

Permanent setup

I wanted a permanent setup. So I put everything on a stripboard.


Above you can see how the stripboard is build. I put a header on the led side so I could use dupont wires to connect the board to the ESP8266.
For the ESP8266 (a Wemos D1 mini) I usede a second piece of stripboard and soldered some headers next to the ESP8266 similar like I did in this story:
http://lucstechblog.blogspot.com/2015/09/nodemcu-breadboard-aid.html

Then I connected the two breadboards with dupont wires.

The idea behind this is that I am using this as a base for a part of my home automation. So as more functionality will be added I might switch to an ESP32 in the future. One of the things that can be implemented direct is the geofencing technique I described in this story: http://lucstechblog.blogspot.com/2020/01/geofencing-for-domoticz-with-esp8266.html

Domoticz

The hardware works. The first thing to do now is to setup a new switch in Domoticz. The complete procedure on how to do that can be found in this story: xxxxxxxxxxxxxxxxxxxxxx
I am going to give you the step by step version here:

- click on the settings menu on the right-side tab in Domoticz
- choose hardware in the settings menu
- add a new virtual switch
- call it virtual doorbell
- as usual the type of the switch is dummy
- when finished click on Make virtual sensors
- choose switch
- give the switch the name Doorbell and as type switch
- now again use the settings menu
- choose devices
- choose active devices
- write down the IDX (index) of the virtual doorbell switch
- now move over to the switches tab
- you can see the last created switch at the bottom being the doorbell
- press the adapt button and alter the icon in a switch


There is now a new switch in the switches section of Domoticz.

The ESP8266 Program

As usual I give you first the complete program and then I will discuss some details.

// ESP8266 program to test a digital pin
// and when that pin is HIGH send a signal to 
// Domoticz. 
// Part of the Domoticz Doorbell project

#include <ESP8266WiFi.h>
#include <ESP8266HTTPClient.h>

// WiFi settings
#define wifi_ssid "XXXXXXXXXXXXXX"
#define wifi_password "YYYYYYYYYYYYY"

// HTTP Domoticz settings
const char* host = "192.168.1.66";
const int   port = 8080;

HTTPClient http;

int toggle = 0;
int sensorValue = 0;
const int buttonPin = 16;  // D0

void setup() 
  {
  Serial.begin(115200);
  setup_wifi();           
  }

void switchonoff()
  {
    // Here is the Json format that Domoticz expects
    // /json.htm?type=command&param=switchlight&idx=99&switchcmd=On
    String url = "/json.htm?type=command&param=switchlight&idx=";
    url += String(8539);
    url += "&switchcmd=On";
    sendToDomoticz(url);
  }  

void loop() 
  {
  sensorValue = digitalRead(buttonPin);
  Serial.println(digitalRead(buttonPin));
  if (sensorValue == 1)
    {
    switchonoff();
    delay (2000);
    }
  delay(10);
  }

//Connect to wifi
void setup_wifi() 
  {
  delay(10);
  Serial.println();
  Serial.print("Connecting to ");
  Serial.println(wifi_ssid);

  WiFi.begin(wifi_ssid, wifi_password);

  while (WiFi.status() != WL_CONNECTED) 
     {
     delay(500);
     Serial.print(".");
     }

  Serial.println("");
  Serial.println("WiFi connection Established");
  Serial.print("IP Adress : ");
  Serial.print(WiFi.localIP());
  }


void sendToDomoticz(String url){
  Serial.print("Connecting to ");
  Serial.println(host);
  Serial.print("Requesting URL: ");
  Serial.println(url);
  http.begin(host,port,url);
  int httpCode = http.GET();
    if (httpCode) 
      {
      if (httpCode == 200) 
        {
        String payload = http.getString();
        Serial.println("Domoticz response "); 
        Serial.println(payload);
        }
      }
  Serial.println("closing connection");
  http.end();
}

I will discuss some of the details here.

#include <ESP8266WiFi.h>
#include <ESP8266HTTPClient.h>

These lines load the necessary libraries into the program.

// WiFi settings
#define wifi_ssid "XXXXXXXXXXXXXX"
#define wifi_password "YYYYYYYYYYYYY"

Put your own router credentials in here so the ESP8266 can contact the router to send data over wifi.

// HTTP Domoticz settings
const char* host = "192.168.1.66";
const int   port = 8080;

This is the IP number and the port number of my Domoticz system. Put in your own numbers.

HTTPClient http;

The webserver instance is initiated.

int toggle = 0;
int sensorValue = 0;
const int buttonPin = 16;  // D0

Some help variables are declared and the pin to which the doorbell circuit is attached is defined.

void switchonoff()
  {
    // Here is the Json format that Domoticz expects
    // /json.htm?type=command&param=switchlight&idx=99&switchcmd=On
    String url = "/json.htm?type=command&param=switchlight&idx=";
    url += String(8539);
    url += "&switchcmd=On";
    sendToDomoticz(url);
  } 

This routine is called form within the loop when the doorbell is ringing.
A string called url is filled with the JSON code that is needed to put the switch in Domoticz ON. By putting this part of the program in its own subroutine it will be possible, when expanding the program, to call the procedure with parameters that represent different IDX numbers and commands like ON and OFF.

void loop() 
  {
  sensorValue = digitalRead(buttonPin);
  Serial.println(digitalRead(buttonPin));
  if (sensorValue == 1)
    {
    switchonoff();
    delay (2000);
    }
  delay(10);
  }

The loop() is where the tests wether the bell has ringed is performed.
The buttonPin is read into the sensorValue variable. the value is for checking printed to the Serial Monitor.
Then a test if made to determine wether the doorbeel has been pushed. If that is the case D0 will be high and the switchonoff routine is called.

You often see that the Wifi Connection is established in the setup() routine.
It is however more comprehensible if the connection is made in its own subroutine and that is done in the setup_wifi() routine.
The routine will print dots into the Serial Monitor until a connection is made with your router. Then the IP adress of the ESP8266 is printed.

void sendToDomoticz(String url){
  Serial.print("Connecting to ");
  Serial.println(host);
  Serial.print("Requesting URL: ");
  Serial.println(url);
  http.begin(host,port,url);
  int httpCode = http.GET();
    if (httpCode) 
      {
      if (httpCode == 200) 
        {
        String payload = http.getString();
        Serial.println("Domoticz response "); 
        Serial.println(payload);
        }
      }
  Serial.println("closing connection");
  http.end();
}

This is the routine that sends the command to set the switch ON to Domoticz.
First the Serial Monitor displays that a connection with Domoticz will be made and that the string URL will se send.

The http.begin command fires the connection with Domoticz with the IP number, Port number and the variable url which contains the JSON code for setting the switch on.

Then a variable httpCode is filled with the return of the http.GET() comand.
This makes sure we get an OK signal (code 200) back from Domoticz so we know everything went well.

Next the connection with Domoticz is closed.

Modifications, upgrades and expansion

This code works flawlessly. It is however better practice to alter the program in a way that an interrupt is fired when the Doorbell button is pushed. Then we do not need an infinite loop in the software that tests the IO PIN constantly.
An interrupt is a shorter and cleaner method.

A first upgrade would be to combine this code with the Geofencing code I shown in this story: http://lucstechblog.blogspot.com/2020/01/geofencing-for-domoticz-with-esp8266.html That way we would only need 1 ESP8266 for multiple purposes.

When the doorbell is rang the button in Domoticz changes its state in ON. As I have the Domoticz app on my Phone I can see the state of the bell changing. You can also send a command to IFTTT and that can send a notification to our phone. Or send a message to Telegram so you will get a notification on your phone. That way we will know when someone is at the door wherever in the world we are, be it just sitting in the garden.

What rests is designing a box in Tinkercad and printing the enclosure with my 3D printer.

That's it for now
have fun

Luc Volders

Friday, April 14, 2023

Showerclock with Raspberry Pi Pico and MicroPython

For an index to all my stories click this text

So we have an energy crisis. And in the Netherlands we all are advised to reduce our energy use. One thing we are asked to do is to take shorter showers. Preferably maximum 15 minutes. And as docile citizens we do as asked..................Wrong !!! We indeed shorten our shower time not because the Government asks us but because energy prices have more then tripled last year.

I have no clock in my shower. And I stopped wearing wristwatches ages ago. So how am I going to know if 15 minutes have past.

Well if you call yourself a tinkerer you should live up to it. Let's build a shower clock !!

My requirements

I do not want a mechanical clock with hands. I want an electronic one. Next to that a small display is not convenient. And it should be watertight.

So then I got an idea.

The time is fixed. So I do not have to have buttons to adjust it. And a small display is an annoyance in the shower so I don't need that either. So why not have a bunch of leds that give a color code. Green when you start showering and red when your 15 minutes are spend.

To have a visual indication on how much time is left I decided to decrease the number of leds that were lit according to the time that has passed. In reality this means that the more time has passed the more the amount of light will get dimmed.

The easiest way to achive this is by using a neopixel ring.

To control the neopixel ring I used a Raspberry Pi Pico. The Pico is widely available and cheap. Next to that it's prime programming language is MicroPython and I love MicroPython.

If you want to learn more about MicroPython on the Raspberry Pi Pico consider buying one of my books on this subject:

http://lucstechblog.blogspot.com/2021/08/raspberry-pi-pico-simplified-now.html

or

http://lucstechblog.blogspot.com/2022/10/pico-w-simplified-released.html

The books are available on Amazon worldwide and through every major bookstore.

The breadboard setup.

If you do not know what neopixels are you really have been living under a rock the last few years, or just stepped into this hobby. In 2015 I already wrote a general introduction to these adressable leds. You can find it here : http://lucstechblog.blogspot.com/2015/10/neopixels-ws2812-intro.html

Neopixels are attached to a microcontroller through a 300-500 ohm resistor. Choose whatever you have available. I usually use a 470Ohm resistor. Next to that attach a large capacitor (1000 microfahrad at 6.3 volts or higher) across the GND and + of the power supply.

That is all.

I had a Neopixel ring of 12 leds and attached it (through the resistor) to GPIO pin 5 of the Raspberry Pi Pico.


Wokwi simulation.

Last year I wrote a story on Wokwi. Wokwi runs on your PC. You can build a circuit in it, add some code and do a real time simulation. You can test circuits with ESP32 or Raspberry Pi Pico and test code in C++ (arduino language) or MicroPython.

If you want to know more just read my story on Wokwi:
http://lucstechblog.blogspot.com/2022/04/simulate-your-controllers-with-wokwi.html

So I thought to put it to the test. And it works flawlessly.
Just point your browser to:

https://wokwi.com/projects/360215418797037569

and you can test the shower timer !!!


Here is how it looks in your browser.

In the simulation I have set the time to .2 minutes. That is 12 seconds so the Neopixels will go out one by one each second. Just adjust this line. Press the green button (where the red arrow points) to start the simulation.

minutes = .2

To any other number of minutes.

Wokwi is a great tool to test your prototypes before building them on a breadboard. There are still some components missing (like capacitors) but it is getting better all the time.

There is just one small problem. In the simulator this program automatically runs twice. In real time it stops after the 15 minutes. I had a conversation with the Wokwi team and they are working on that problem, so maybe it is even solved when you are reading this. So don't worry in real time it works as it should.

The program

For this program I used the simple Neoppixel driver which is included with MicroPython for the Pico. There is a far better library with much more functionality which I described in my book Raspberry Pi Pico Simplified. But that is overkill for this project.

Next to that we only need the machine library to control the IO pin and the utime library to get the clock working. Both libraries are included in the MicroPython distribution.

Here is the full program.

'''
Shower Timer with a fixed time of 16 minutes
http://lucstechblog.blogspot.com
'''

import machine
import neopixel
import utime

# Set up the neopixels
numpixels = 12
pixelpin = machine.Pin(5)
neopixels = neopixel.NeoPixel(pixelpin, numpixels)

# Set up the timer
minutes = 16
seconds = minutes * 60


print("Starting timer")
for i in range(numpixels):
    neopixels[i] = (0, 255, 0)  # Set all neopixels to green
neopixels.write()

while seconds > 0:
    # Update the neopixels
    remaining = seconds / (minutes * 60)
    num_lit = int(numpixels * remaining)
    for i in range(numpixels):
        if i < num_lit:
            neopixels[i] = (0, 255, 0)  # Set lit neopixels to green
        else:
            neopixels[i] = (0, 0, 0)  # Set unlit neopixels to black
    neopixels.write()
    # Decrement the timer
    seconds -= 1
    utime.sleep(1)
    
print("Timer finished")
for i in range(numpixels):
    neopixels[i] = (255, 0, 0)  # Set all neopixels to red
neopixels.write()

As you can see this is a straight forward program. No functions and no endless loops that keep the program running.

As usual on this weblog I describe some parts of the program in detail.

import machine
import neopixel
import utime

# Set up the neopixels
numpixels = 12
pixelpin = machine.Pin(5)
neopixels = neopixel.NeoPixel(pixelpin, numpixels)

# Set up the timer
minutes = 16
seconds = minutes * 60

Nothing special in the above part. The required libraries are loaded and the Neopixel ring with 12 pixels is attached to GP5. The number of minutes is set to 16 which I will explain later. The number of minutes are used to calculate the number of seconds.

print("Starting timer")
for i in range(numpixels):
    neopixels[i] = (0, 255, 0)  # Set all neopixels to green
neopixels.write()

For debugging purposes I added some print statements that will do nothing in the final setup. All 12 neopixels are set to green.

while seconds > 0:

Here starts the program. It runs as long as the number of seconds is larger as 0

    remaining = seconds / (minutes * 60)
    num_lit = int(numpixels * remaining)

This is where the calculation is made on how many Neopixels must be lit and how many are black.

Let us say 3 minutes have passed.
When the program starts the number of seconds = 16 minutes x 60 seconds = 960.
When 3 minutes have past 3 x 60 = 180 seconds have passed. This means that there are 960 - 180 = 780 seconds left.

    remaining = (780) / (16 x 60)
    remaining = 0,812

    num_lit = int(12 * 0,812)
    num_lit = int(9,75) = 9


So after 3 minutes 9 Neopixels will be lit and 3 will be dark.

    for i in range(numpixels):
        if i < num_lit:
            neopixels[i] = (0, 255, 0)  # Set lit neopixels to green
        else:
            neopixels[i] = (0, 0, 0)  # Set unlit neopixels to black
    neopixels.write()

This is where the Neopixels are set to green or black according to the calculation just made.

    # Decrement the timer
    seconds -= 1
    utime.sleep(1)

And in this last part the program stops for a second and the number of seconds remaining is decreased by one.

print("Timer finished")
for i in range(numpixels):
    neopixels[i] = (255, 0, 0)  # Set all neopixels to red
neopixels.write()

When the number of remaining seconds reaches 0 all Neopixels are set to red as a warning that the time is up !!!

Why 16 minutes and not 15

Well I took the easy way out. I attached the Pico to a powerbank. So to start the program just plug the powerbank in and the program runs. No need for an on/off switch or a start button.

But then I need some time to put the cable into the watertight housing and screw the lid on, and then step into the shower This takes not much time but I decided to reserve a minute for this. That is why I opted for 16 minutes in stead of 15.

If you build this for  yourself and need more or less time just adjust the line:

minutes = 16

In real life.

Save the program on your Pico and call it main.py. A program with the name main.py will automatically start when the Pico is powered up.


Here is the picture of the breadboard setup with my attached powerbank in the back.


Here you can see how it is all crammed into a jar. I did some testing and the jar is watertight. I did not test for waterproof as I am not going to submerge this into my bath. It is standing on a shelf in my bathroom and for that is is sufficient watertight.


And here is how it looks when the time is up !!!

Last and next thing to do is to put it on a stripboard for permanent use.

Other purposes.

Well this timer can be used for many other purposes. How about a timer for tasks behind your desk. Set the time to 30 minutes and after these you stop whatever you're doing and start something else.

Till next time,
Have fun

Luc Volders


Friday, April 7, 2023

Getting the right time with MicroPython

 For an index to all my stories click this text

I am working at several time related projects. A talking clock and a special clock for very small kids. These projects are Raspberry Pi Pico based and the software is written in MicroPython.

There are two versions of the Pico. The Raspberry Pi Pico and the Pico W. They are basically the same except that the Pico W has wifi on board.

One of my clock projects, build with the Pico, sets the time with 2 buttons. The first button increases the hours, the second button increases the minutes. This time is set into the Pico's RTC (real time clock). As the Pico's build in oscillator generates a very stable and accurate pulse you only have to adjust the time every few days.

The Pico W offers an extra functionality. It can get the right time from the internet. That way we do not have to set the time manually.

Time on the internet.

When you boot your computer or tablet you will notice that it will display the right time. That is because these devices fetch the time from the internet. There are special servers that provide the right time. They are called Network Time Protocol servers. Abbreviated to NTP servers.
NTP servers have been around for a long time. Large database systems and company servers depend on them to synchronise their services.

And lucky for us mere mortals, we are allowed to access these servers so we can get the right time.

In MicroPython there is a special library for getting the time from an NTP server. Unfortunately it is not included in the standard libraries and a bit hidden on the MicroPython Github Repositry. Here is the link:
https://github.com/micropython/micropython-lib/blob/master/micropython/net/ntptime/ntptime.py

For convenience I copied the library to my own Github repositry. You can find it here: https://github.com/Lucvolders/MicroPython/tree/main/Libraries/NTPtime

The library gets the time from an NTP server and updates the build in RTC. So the RTC has the right time and that can be used in your own projects.

Here is the complete code in MicroPython.

import time
import ntptime
import machine
import network

# Router credentials
ssid = "ROUTERS_NAME" # wifi router name
pw = "PASSWORD" # wifi router password
print("Connecting to wifi...")

# wifi connection
wifi = network.WLAN(network.STA_IF) # station mode
wifi.active(True)
wifi.connect(ssid, pw)

# wait for connection
while not wifi.isconnected():
    pass

# wifi connected
print("Connected. IP: ",str(wifi.ifconfig()[0], "\n")) 

rtc = machine.RTC()

rtc.datetime((2000, 1, 1, 0, 0, 0, 00, 0))
print(time.localtime())

ntptime.settime()
time.sleep(2)

dstadjust = 1

while True:
    print ("Year   = ", time.localtime()[0])
    print ("Month  = ", time.localtime()[1])
    print ("Day    = ", time.localtime()[2])
    hour = time.localtime()[3]
    hour = hour + dstadjust
    print ("Hour   = ", hour)
    print ("Minute = ", time.localtime()[4])
    print ("===============")
    time.sleep(10)

As usual I will highlight parts of the program for an explanation.

import time
import ntptime
import machine
import network

The libraries that we need are loaded. Do not forget to copy the ntptime.py library into the Pico's lib folder.

# Router credentials
ssid = "Routers name" # wifi router name
pw = "Routers password" # wifi router password
print("Connecting to wifi...")

# wifi connection
wifi = network.WLAN(network.STA_IF) # station mode
wifi.active(True)
wifi.connect(ssid, pw)

Make sure to fill in your routers credentials here and the program uses these to connect to the internet.

# wait for connection
while not wifi.isconnected():
    pass

The program waits till a connection to the internet is established.

# wifi connected
print("Connected. IP: ",str(wifi.ifconfig()[0], "\n")) 

For your convenience your Raspberry Pi Pico's IP number is printed in Thonny's shell.

rtc = machine.RTC()

rtc.datetime((2000, 1, 1, 0, 0, 0, 00, 0))
print(time.localtime())

The RTC (real time clock) is activated and the date and time are initially set to the year 2000, month 1 and day 1, 0 hour, 0 minutes.

ntptime.settime()
time.sleep(2)

The ntptime library gets the right time from the internet and sets it into the Raspberry Pi Pico's RTC. Then we wait 2 seconds for everything to settle down.

dstadjust = 1

As I do not know where you live you will have to adjust the figure 1 yourself. dstadjust is the daylight savings time adjustment. Here I use the value 1 as I am in the Netherlands. Adjust this value to your own needs.

while True:
    print ("Year   = ", time.localtime()[0])
    print ("Month  = ", time.localtime()[1])
    print ("Day    = ", time.localtime()[2])
    hour = time.localtime()[3]
    hour = hour + dstadjust
    print ("Hour   = ", hour)
    print ("Minute = ", time.localtime()[4])

    print ("===============")
    time.sleep(10)

The while-True loop runs forever and in the loop the relevant information is printed in Thonny's shell.

time.localtime() is a tuple. Each of the tuple's elements can be adressed like this:

time.localtime()[X])

In this the X represents the elements of the tuple.
0 is the year, 1 is the month, 2 is the date, 3 is the hour and 4 are the minutes. The elements 5,6 and 7 are the seconds, day of the week and the day of the year. These last 3 elements are not used in my projects.

Please pay attention to the next lines:

    hour = time.localtime()[3]
    hour = hour + dstadjust
    print ("Hour   = ", hour)

First time.localtime()[3] is copied in a varaible with the name hour. Then we adjust that variable with the dstadjust value for getting the right hour and then we print the value.


And this is how the program prints its data in Thonny's shell.

If you are planning to build some time-related projects this should get you going.

Till next time
have fun

Luc Volders