For an index to all my stories click this text.
Easing your life is always an interesting option. And I found a new way to achieve that.
Sometimes I need to transfer files from my Android Phone to my computer. These files can be anything. From screenshots of my projects meant for my weblog or photo's or anything else that I might want to keep.
Until now I have been using Google Drive for this. On my phone I click the file, click on share, choose Google Drive and save the file on Drive. At the PC side I do not have drive installed. So I use the webversion of drive. I choose the files and download them. Then I transfer them from the download folder to where I want to have them. I bet this is what most people do.
I found however an easier version, when I was playing with Telegram.
Like discussed in a previous story about Telegram there is a webversion available. You can re-red how to use that here.
http://lucstechblog.blogspot.com/2023/02/convenient-working-with-telegram.html
A nice addition is that you can use that to transfer files from your Android Phone to your PC easily.
From Android to your PC
First chose a file. It can (like said above) anythink. A photo, a screenshot, an APK file you downloaded or anything you like.
Here I chose a photo I took from my customer counter project.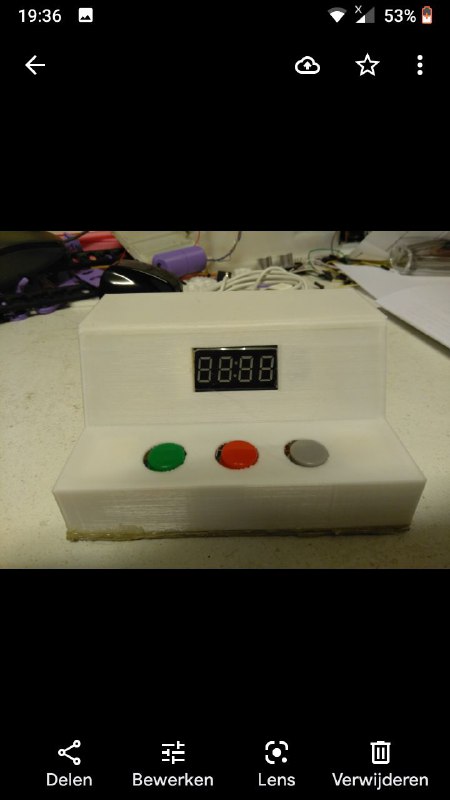
Choose the triangle sign at the bottom of the screen. It says share or in Dutch Delen.
Choose share with Telegram
Choose with whome you want to share the file. I choose my Telegram Bot called Myhome.
and there it is in Telegram an your Android Phone.
Now open Telegram on your PC
Here are the messages from Myhome. And the picture is there.
Now use the right mouse button and choose Save As and save the picture on your PC.
From your PC to Android
So what if you want to transfer files the other way round. From your PC to your phone.
Well that's equally easy. Start with opening telegram on your PC. Open the chat with your bot. In my case that is Myhome.
At the bottom of the screen click on the square icon (where the arrow points). Your PC's fileselectro will open.
I chose a picture of a painting my girlfriend made.
It will take a while to send the picture to Telegram as it is a few hundred K's. But then it is available on your phone and you can download it there.
If you want to send the high resolution versions of your pictures, click on the paperclip and make sure you set compression off (in the 3 dots menu at the top of the page).
That's all. Easy and convenient. And like I said you can do this with any file on your Phone.
Till next time
have fun
Luc Volders

Friday, March 17, 2023
File transfer with Telegram
Friday, March 10, 2023
Octoprint notifications to Telegram
For an index to all my stories click this text


If you own a 3D printer I really recommend working with Octoprint. Octoprint runs on a Raspberry Pi (Model 2B or higher) and makes lfe a lot easier. You can get Octoprint (called Octopi for the Raspberry) here: https://octoprint.org/download/
Some time ago I posted a filament runout sensor for my 3D printer which you can re-read here: http://lucstechblog.blogspot.com/2020/05/filament-sensor-with-alarm-on-your-phone.html
This was a great help when I was printing with some really old brittle filament. But there was something else I felt lacking.
I often start my print and then go do something else. In the summer I often sit in the garden, reading and enjoying a good book and cold drinks. However I frequently go inside to my mancave to check if the printer has finished.
Obviously I can check that using Octoprints website and looking at the webcam picture. But I found a better option.
Sometime ago I started using Telegram as my main information system. I can use it as a whatapp replacement. However Telegram can do so much more. I connected it to my home automation system, Domoticz, and have several ESP's sending data and alarms to Telegram when needed.
And I connected Octoprint to Telegram. So now I get a message on my phone when a print has finished complete with a picture.
Let's do this.
Installing and configuration of the Telegram plugin will only work when your printer is idle. So make sure you are not printing anything when following these steps.
The first step is to go to Octoprints settings page. It is the small wrench at the top right of the page.
Choose Get More until you find the Telegram plugin and click on that to install.
Installing may take a little while depending on which Raspberry you are using.
When the plug-in is installed you need to restart Octoprint. That's another reason why you should not be printing whenn installing.
When installation has finished click on the plug-in to configurate it. You will need to have Telegram installed on your phone and have made a bot. Not sure how to do that ? Read this story http://lucstechblog.blogspot.com/2023/01/telegram-messenger-for-iot.html
Open Octoprint and Telegram on your PC
Fill in the bot's token and click Test this token. Octoprint will send a test message to your Telegram bot to see if everything works as planned. Copying the token from your phone into Octoprint is almost impossible. You will have to retype a looooonnnnggg string. So best practice is to open Octoprints webpage on your PC and open Telegram on your PC. Then you can simply copy the token from one window into the other.
If you have not yet tried Telegram on your PC you can find a tutorial here:
http://lucstechblog.blogspot.com/2023/02/convenient-working-with-telegram.html
In the Octoprint Settings you can find the plugins at the bottom of the settings. Click on the notify icon (the small blue cloud)
Now you can chose which notifications Octoprint should send to Telegram. I chose only one being PrintDone. Alter this to your own liking.
Scrolling down in the settings you can alter each notification which you might have chosen. If a button is green it is activated. A red button is not. You can even alter the text that is being send. and the {file} parameter makes sure that the filename is incorporated into the text.
Now start a small test print. I printed a shopping cart coin which just takes 2 minutes to print. And after these two minutes I got a notification on my phone complete with a picture of the printed item.
This makes life a lot more comfortable !!!
Till next time
Have fun
Luc Volders
Friday, March 3, 2023
ESP sending an alert to Telegram
For an index to all my stories click this text.
This is another entry in my series on using Telegram for IOT purposes.
The first story showed how to get a Telegram account, make a bot and have your ESP connected so you can send commands from Telegram to the ESP to set lamps (etc) on or off. Read that story here cause the program shown there is the base for all consecutive stories.
http://lucstechblog.blogspot.com/2023/01/telegram-messenger-for-iot.html
The second story showed how to use Telegram on your PC next to your Android Phone. This is for home purposes more convenient as you can work on a big screen. For on the road the smartphone version is king. Read that story here: http://lucstechblog.blogspot.com/2023/02/convenient-working-with-telegram.html
The third story showed how to send commands to Telegram for getting sensor readings from your ESP back. The program shown in this story is the base version from the first story with additions to do sensor readings. Read that story here: http://lucstechblog.blogspot.com/2023/02/request-esp-sensor-data-with-telegram.html
This story adds an important thing: notifications. In the previous versions Telegram had to send a command to the ESP to get the readings from your sensors. This story shows how your ESP can send notifications to Telegram. So when a sensor reaches a critical value (temperature to high or low, door open, movemenet detected etc) the ESP will send a warning to Telegram.
Setting up Telegram.
Well I presume you have an account and have already added a bot in Telegram. If not do that first. You can read how to do that in the first story in this series: http://lucstechblog.blogspot.com/2023/01/telegram-messenger-for-iot.html
And because we have to copy some information out of Telegram into the ESP's program it is much easier to work on your computer screen as it is to work on your phone. So start telegram on your PC. If you do not know how to do that read this story first: http://lucstechblog.blogspot.com/2023/02/convenient-working-with-telegram.html
The first thing to do is to get the ID of our bot. You can do that with IDBot a special bot in Telegram that gets the ID.
In Telegram search for IDBot. You will get multiple entries but use the first, the one with the blue logo with the fingerprint in it.
Click on this bot and it will activate and shows the start message. Just click on Begin.
The Bot will be added to your Telegram account.
Just as with your own bot /start will show which commands you can use. We are going to use /getid.

And there is is. I painted it red because I do not want you all to send commands to my bot ;) So keep this ID to yourself just like the Telegram token. Then nobody except yourself can access your home automation system.
You will need this ID and your Telegram token for the next steps.
Breadboard test testup
You can use the same test setup on a breadboard as I published in this story: http://lucstechblog.blogspot.com/2023/02/request-esp-sensor-data-with-telegram.html
However for a quick test just a button is sufficient. Attach the button with a pull-up resistor to GPIO14 if you have a Doit Dev Kit board like I have. Otherwise choose a pin to your liking. Just be carefull: not all IO pins will work when using wifi.
Sending a message to your Bot.
There is a Telegram API to send messages to your bot.
https://api.telegram.org/bot<TOKEN>/sendMessage?chat_id=<CHAT_ID>&text=Just%20a%20test
You can try this in your browser. Just replace <TOKEN> with your token and <CHAT-ID> with the chat ID you just got and hit enter. The message should appear in Telegram. You can alter the text to your liking as long as you remember to replace spaces with %20.
ESP program
You can use the next test program with the ESP8266 and the ESP32. The version I am presenting here is for the ESP32 but can be used with the ESP8266 with some minor alterations.
/*
Luc Volders
http://lucstechblog.blogspot.com/
*/


#include <WiFi.h>
#include <HTTPClient.h>

const char* ssid = "ROUTERS NAME";
const char* pass = "PASSWORD";

String text;

void setup()
{
  // initialize the Serial
  Serial.begin(115200);
  Serial.println("Starting...");

  WiFi.begin(ssid, pass);
  delay(500);
  while (WiFi.status() != WL_CONNECTED)
  {
  Serial.print('.');
  delay(500);

  pinMode(14, INPUT);
  }
}

void loop()
{
    if ((digitalRead(14))==0)
    {
      Serial.println("PRESSED");

    HTTPClient http;
    text = "https://api.telegram.org";
    text +="/bot";
    text += "YOUR TELEGRAM TOKEN";
    text +="/sendMessage?chat_id=YOUR ID";
    text +="&text=Button pressed";
    http.begin(text);
    int httpCode = http.GET(); //Send the request
    if (httpCode > 0)
      { //Check the returning code
      String payload = http.getString(); //Get the request response payload
      Serial.println(payload); //Print the response payload
      }
  http.end(); //Close connection
    }
}
Nothing special in this program. Just fill in your routersname and password and at the bottom in the loop fill in your Telegram Token and ID.
To alter the prograqm for the ESP8266 just alter
#include <WiFi.h>
#include <HTTPClient.h>
into
#include <ESP8266WiFi.h>
#include <ESP8266HTTPClient.h>
and in the setup alter
pinMode(14, INPUT);
into
pinMode(12, INPUT);
And the last alteration is
if ((digitalRead(14))==0)
into
if ((digitalRead(12))==0)
And do not forget to attach the button to D5 (pin12).
Before you go to the next step, test this thoroughly. If you press the button a few moments later you will get a notification from Telegram on your phone.
Combining it all.
Maybe you have a seperate ESP-01 on which you want to put the previous program for example a door-bell alarm. However most of the time you will have multiple sensors on your ESP. So therefore I am showing you here the combined program for sending commands and getting notifications on Telegram.
/*
Name:                     Telegram sensor readings
Library and demo Author:  Tolentino Cotesta <cotestatnt@yahoo.com>

Adapted by:               Luc Volders
                          http://lucstechblog.blogspot.com/
*/

#include <Arduino.h>
#include "AsyncTelegram.h"

//#include <WiFi.h>
#include <HTTPClient.h>

#include <DallasTemperature.h>
#include <OneWire.h>

# define ONE_WIRE_BUS 23
OneWire oneWire(ONE_WIRE_BUS);

AsyncTelegram myBot;

DallasTemperature dallas(&oneWire);

float temp = 0;
int button = 34;
String tosend = "";
String text;


const char* ssid = "YOUR ROUTERS NAME$";
const char* pass = "ROUTER PASSWORD";
const char* token = "TELEGRAM TOKEN";

int led = LED_BUILTIN;

void setup()
{
  // initialize the Serial
  Serial.begin(115200);
  Serial.println("Starting TelegramBot...");

  WiFi.setAutoConnect(true);
  WiFi.mode(WIFI_STA);

  WiFi.begin(ssid, pass);
  delay(500);
  while (WiFi.status() != WL_CONNECTED)
  {
  Serial.print('.');
  delay(500);
  }

  myBot.setUpdateTime(1000);
  myBot.setTelegramToken(token);

  Serial.print("\nTest Telegram connection... ");
  myBot.begin() ? Serial.println("OK") : Serial.println("NOK");

  dallas.begin();

  pinMode(led, OUTPUT);
  digitalWrite(led, LOW); //<== high for esp8266

    pinMode(14, INPUT);
}

void loop()
{
TBMessage msg;

  if (myBot.getNewMessage(msg))
  {
    if (msg.text.equalsIgnoreCase("Lon"))
    {
      digitalWrite(led, HIGH); //<== low for esp8266
      myBot.sendMessage(msg, "Light is now ON");
    }

    else if (msg.text.equalsIgnoreCase("Loff"))
    {
      digitalWrite(led, LOW); //<== high for ESP8266
      myBot.sendMessage(msg, "Light is now OFF");
    }

    else if (msg.text.equalsIgnoreCase("Temp"))
    {
      dallas.requestTemperatures();
      Serial.print("Temperature is: ");
      temp=dallas.getTempCByIndex(0);
      Serial.println(String(temp));
      tosend = "The temperature is now : ";
      tosend += String(temp);
      myBot.sendMessage(msg, tosend);
    }

    else if (msg.text.equalsIgnoreCase("LDR"))
    {
      Serial.print("The LDR's value is: ");
      Serial.println(analogRead(15));
      tosend = "The LDR's value is : ";
      tosend += String(analogRead(32));
      myBot.sendMessage(msg, tosend);
    }

    else
    {
      // generate the message for the sender
      String reply;
      reply = "Welcome ESP8266 number 1\n" ;
      reply += "You can use these commands :\n" ;
      reply += "============================\n\n" ;
      reply += ". Mancave Light on = Lon\n";
      reply += ". Mancave Light off = Loff\n\n";
      reply += ". What is the temperature = Temp\n";
      reply += ". The light value = LDR\n";
      myBot.sendMessage(msg, reply);
    }
  }
      if ((digitalRead(14))==0)
    {
      Serial.println("PRESSED");

    HTTPClient http;
    text = "https://api.telegram.org";
    text +="/bot";
    text += token;
    text +="/sendMessage?chat_id=YOUR ID";
    text +="&text=Button pressed";
    http.begin(text);
    int httpCode = http.GET(); //Send the request
    if (httpCode > 0)
      { //Check the returning code
      String payload = http.getString(); //Get the request response payload
      Serial.println(payload); //Print the response payload
      }
      http.end(); //Close connection
    }
}
As you can see it is just the program from the first story in this series combined with the above program. Again this version is for the ESP32 but adapting it for the ESP8266 should prove easy when you followed all the stories in this series.
In the original program the Telegram Bot had a button entry in which you could ask the ESP for the state of the button (pressed or not). I left that out of this version because the button has now a different function.
If you need to test for the state of a switch or other sensor just put it in again and attach that sensor to another pin on your ESP.
Bye Bye IFTTT
I used to use IFTTT for getting alerts on my phone and for other tasks. However IFTTT only alows you to make 3 custom applets for a free account. As I want/need more as 3 custom aplets I have 2 choices. Make a universal applet for IFTTT, something I am tinking about or use Telegram as my all in one chat and IOT console. For now I opt for the last choice.
Domoticz ????
There is one thing left to do. I use Domoticz for my home automation. For commanding Domoticz from my Phone there are two options. There is a Domoticz app in Googles Play store and I have made my own dedicated app.
Domoticz can send notifications to my Telegram bot about my lights, temperature etc. But I can not command my lights from Telegram with my phone. Or can I ??? Stay tuned and I will show you how to do that in an upcoming story.
Till next time
Have fun
Luc Volders