
All these projects have something in common and that is that they attach an ESP to a web-page which can be controlled from your computer or phone. This works great when you are inside the environment of your wifi home network.
However not all projects are intended to be used from within your home or office. Sometimes you need to control things from another location (your office, on a holliday, visiting friends etc). That implies that you need to open a port on your home router so the information can get out your local environment. This is called port-forwarding.
So if you have multiple sensors and switches attached to multiple ESP's in your house you will need to open many ports on your router and that could (mind you I do not say "will") bring a safety issue. Opening ports on a router may open a port to a hacker, and that is something we certainly do not want to happen.
There are multiple solutions to this. One involves an intercommunication system amongst your ESP's. Meaning that all your ESP's talk to eachother and just you have one central system (being an ESP or a Raspberry) talking to the outside world. That is not the solution I am going to talk about here.
The solution I am going to discuss is using an external IOT platform.
What is an external IOT platform.
Basically it is a computer system run by a company that has an internet connection and allows you to send data to. This data will be put on an open or private webpage which you can access from any part in the world.
The advantage is that any device in your network only has to send data to this computer just like your home computer sends and receives data to and from the internet.
No need to open ports in your router, and often they offer a fancy interface that is easy to use. So there is not a lot of programming hassle.
Thingspeak

In this example I am going to demonstrate how you can put the information from the ESP-Thermometer on to the world-wide-web and read the temperature in your home from any place in the world. I am using the Thingspeak service for this as it has a very easy interface which can be used easily from ESP-Basic or the Arduino environment.
So the first thing you will have to do is to visit the Thingspeak website: https://thingspeak.com/
If you not have an account already (if you have you would not be reading this) Sign Up for an account. You will be asked an e-mail adress, a user ID (which you can define yourself) and a password. Remember both the user ID and the password. You wil be needing them both in the future.

After successfully signing up you will start at the channels page. At this moment you will not have any channels so choose to make a new one. You will be taken to a new page where you can fill in the details of this channel.

Above you can see that I filled in the first details for this channel. Give each channel an identifying name and fill in a fitting description. We will only have one field in this channel being the temperature. If you would have multiple sensors attached to your ESP you could for example have a second filed that represents a door movement. That way you could relate between an opening door and the temperature.
Public channels can be accessed by anyone without even having to login. For now make it public.
Now press the Save button.

You will be represented with another screen that shows you the most important part: a chart with your workroom temperature. Off course there will be no information filled in yet.
As you can see there are 3 buttons. Two of them are important at first. The "More Information" button brings you to your own webpage. The "Data Export" button makes it possible to save all the data in a JSON, XML or CSV file on your computer for off-line analysing.

Here you will find your personal key for writing information to Thingspeak or reading information out of a channel.
For now we will only be looking to writing information to a channel. We will need the Write API key for that. So leave this screen open so you can easily copy the API key later on in your program.
Writing thermometer values to Thingspeak.

In the article "Oh no not another thermometer" I build a.....thermometer that displays the temperature on a webpage using an ESP and a Dallas 18b20 sensor. I programmed it in ESP-Basic and it has been functioning for many weeks in a row flawlessly. But it was only accessible from within my own home-network. Now we are going to bring it in the open.
Open a webpage and access the thermometer. If you do not know how to find it look at this article which gives you the basic information about ESP-Basic.
tel=0
Timer 5000, [start]

wprint "<!DOCTYPE html>"
wprint "<html> <body>"
wprint |<body style="background-color:greenyellow;">|
wprint |<H1><span style="color: red;">|
wprint " A thermometer"
wprint "</H1>"
wprint "</span>"
wprint |<H2><span

style="color: blue;">|
wprint "Temperature is now "
textbox test

a = "background-color:greenyellow;"
a = a & "display:block;width:80px;"
a = a & "border-style: hidden;"
a = a & "font-size: 22px;"
a = a & "font-weight: bold;"
a = a & "color: fuchsia ;"
cssid htmlid(), a
wprint "</span>"
wprint "</H2>"
Wait

[start]
test = temp(0)
test = ((int(test*10))/10)
tel=tel+1
if tel = 360 then
  tel = 0
  gosub [thing]
endif
wait

[thing]
sendthing = str(test)
SENDTS("MY-API-KEY", "1", sendthing)


return
Now open the Edit page and look how I altered the Basic Program.
What I wanted to do is to have the thermometer send it's information each half hour to the thingspeak channel. Therefore I altered three things in the program.
tel=0
I inserted this line to the top of the program to initiate a new variable.
[start]
test = temp(0)
test = ((int(test*10))/10)
tel=tel+1
if tel = 360 then
tel = 0
gosub [thing]
endif
wait
I altered this routine so that each time the routine is called (every 5 seconds which is set by the TIMER 5000 command) 1 is added to tell. And if tell has reached the value 360 (which is in time 5 seconds * 360 = 30 minutes) the routine [thing] is called.
[thing]
sendthing = str(test)
SENDTS("MY-API-KEY", "1", sendthing)
return
So eacht time (every 30 minutes) when this routine is called the string variable sendthing is filled with the actual temperature (test). And then SENDTS("MY-API-KEY", "1", sendthing) sends the information to field "1" in my Thingspeak channel. If you have more fields you obviously alter the "1" in the field you want to write to.
In the mean time the information on the local webpage will still be updated every 5 seconds.
You will have to substitute MY-API-KEY with your own key which you can find at the API-KEY tab in your channel. Make sure you use the "Write API Key" and not the read one which is used to read information from the page, nor for putting info on it.
That's all !!
Run the Basic program and just wait.

Here you can see the temperature in my room over a period of one and a half day.
More information needed
Thingspeak is free as in free beer as long as you do not exceed 8200 messages a day or 3.000.000 (yes 3 million) messages a year. You can update the info every 15 seconds.
If you have multiple sensors connected to an ESP you can add more fields in a channel or even open more channels depending on how you want to present the data. By opening multiple channels you have to use multiple API-Keys, one for each sensor.
If you are using multiple ESP's you can have them writing to the same channel, so you can have one graph with temperatures of several chambers in your house. Or you can open multiple channels, each ESP it's own.
Just decide what is most convenient for your projects.
However keep the limits in mind. And make sure the writing of data on each filed or channel overlaps as you can update only once every 15 seconds.
Minimalistic setup.
As ESP-Basic is really awesome for rapid devellopment I will give you a minimalistic setup here.
Timer 1800000, [start]
wait
[thing]
sendthing = str(temp(0))
SENDTS("MY-API-KEY", "1", sendthing)
return
These 7 lines is all it takes to send the information to my Thingspeak channel. The setback is that there is no fancy local webpage I can access on my phone or tablet to have a look at the temperature. You can only get the information through Thingspeak.
Even better.
To access your information you can log in from any place in the world to the thingspeak. But it even gets better. You even do not need to login for getting at your info.

Just go the Thingspeak website.
And in the top tabs choose "Channels" You will be presented by a similar page as shown here.

Now fill in your user ID on the right side of the screen and it will give you your channels

Clicking on the name of the channel in the blue banner will direct you to the information.

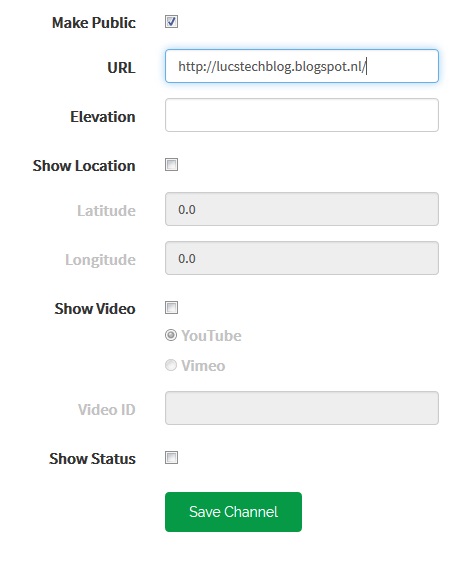
Remember this part of the setup page. You filled in "Make Public"
Setting a channel as public means that you even do not have to log in to access the information.
Be carefull
As said above a channell's information is accessible for anyone if it is set to public. That really means that anyone in the world can have access to the information. So be carefull.
Do not use your real name in Public information. Give no clues about who you are, what your location is etc etc etc.
Suppose you have a public channel that displays the information in your house. Or the water usage, or the time the lights are on etc etc etc. If the information is public this is valuable info for any burglar or thieves. Read here about this privacy issue: http://lucstechblog.blogspot.nl/2017/02/burglars-invited.html
In future stories I will show you how to send info to Thingspeak with the Arduino IDE and I will show you how to get information from the Thingspeak channel to perform actions on.
What more IOT platforms are avalable ?
Actually there are quite a few IOT platforms available. Some of them are equally easy to use like Thingspeak. An exampleis Dweet which I am going to discuss in an upcoming stories.
Others like Blynk and Cayenne IOT have many advantages and possibillities. However they require you to install libraries in your ESP. This will work while programming in the Arduino IDE but not (yet) in Basic. Programming is more difficult. And this article is aimed at fast results. Besides that Blynk is only free to a certain amount of channels.
Nevertheless it is something I will be checking into in future stories.
Till next time
Have fun
Luc Volders